
IOT with Raspberry PI and Android (control LEDs remotely)
Introduction to IOT (Internet of Things):
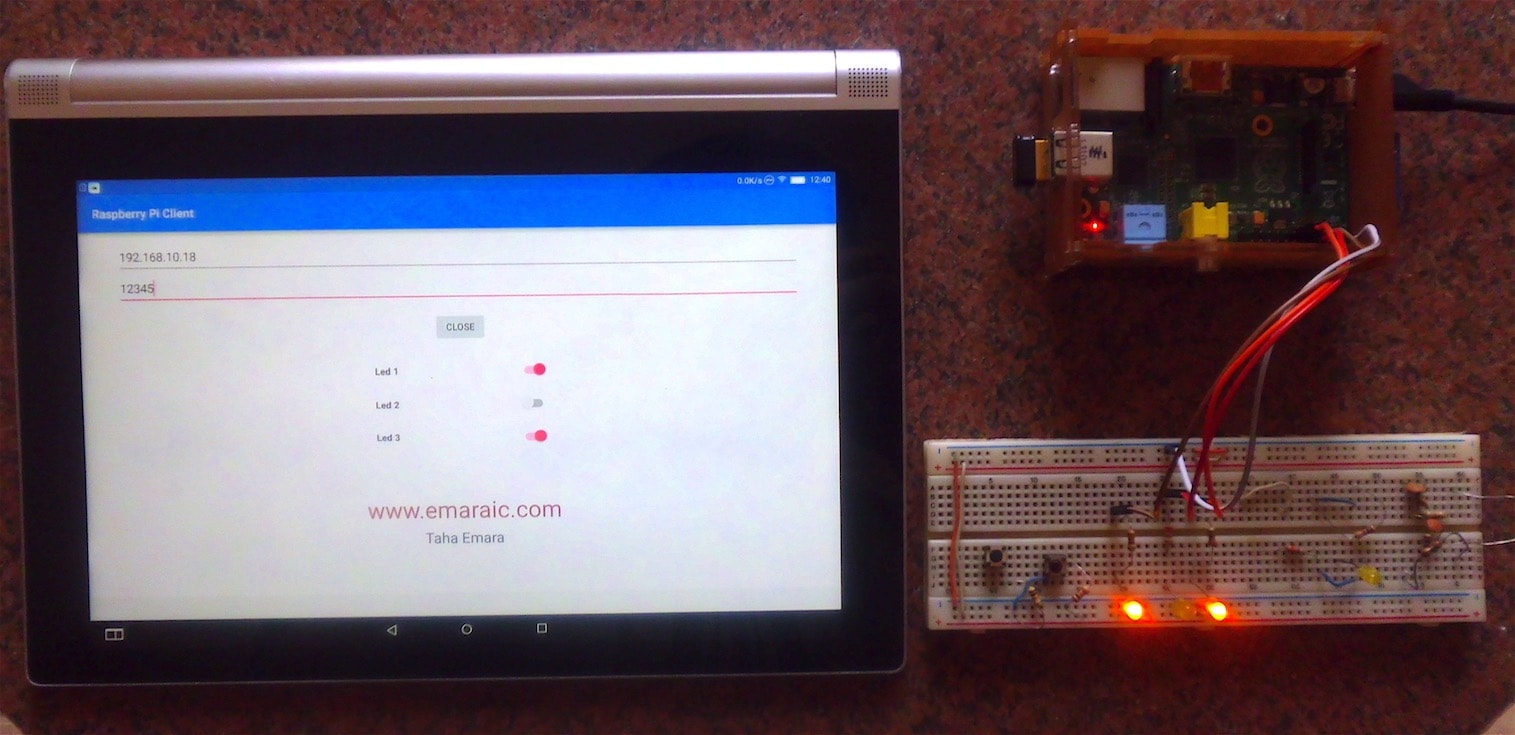
IOT is a concept provides a link for an object (sensors, lamps, …Etc) or a systems as HVAC or lighting systems to the Internet. It extends the connectivity of the Internet beyond PCs, tablets and smart phones to others devices which are not considered smart. Briefly, we assign an IP to things to communicate with them either for control or monitoring. In this instance, I used my android tablet to control 3 LEDs attached to raspberry pi GPIOs via Sockets using Java. Of causer this is a simple prototype but you can build a cool things on it.Requirements:
- Raspberry Pi 3 Model B Motherboard
running Raspbian(already Java is installed in it).
- 3 LEDs and 3 resistors 330 ohm.
- USB power supply.
- Netbeans IDE to compile raspberry pi side code.
- Android studio to compile android code.
- Source Code, you can get it from https://github.com/tahaemara/IOT-with-raspberry-pi-and-Android .
System description:
This project was built on socket programming, so what is the socket? A Socket is a way provides a communication channel between two terminals ( raspberry pi and android phone) using TCP. Server socket is defined by IP address and port number then client can communicate with server through these parameters. Server creates ServerSocket object with specific IP and port and then accept() method is invoked which puts the server waits for clients. If any client connects to server via its IP and port, the accept() method returns a reference to a new socket on the server then we can perform I/O stream operations. Next table shows commands (which are sent through the channel from android app to raspberry pi) and the correspondent actions between client and server, you can define your own.
| Command | Action |
|---|---|
| 10 | turn off GPIO 0 (Led1) |
| 11 | turn on GPIO 0 (Led1) |
| 20 | turn off GPIO 1 (Led2) |
| 21 | turn on GPIO 1 (Led2) |
| 30 | turn off GPIO 2 (Led3) |
| 31 | turn on GPIO 2 (Led3) |
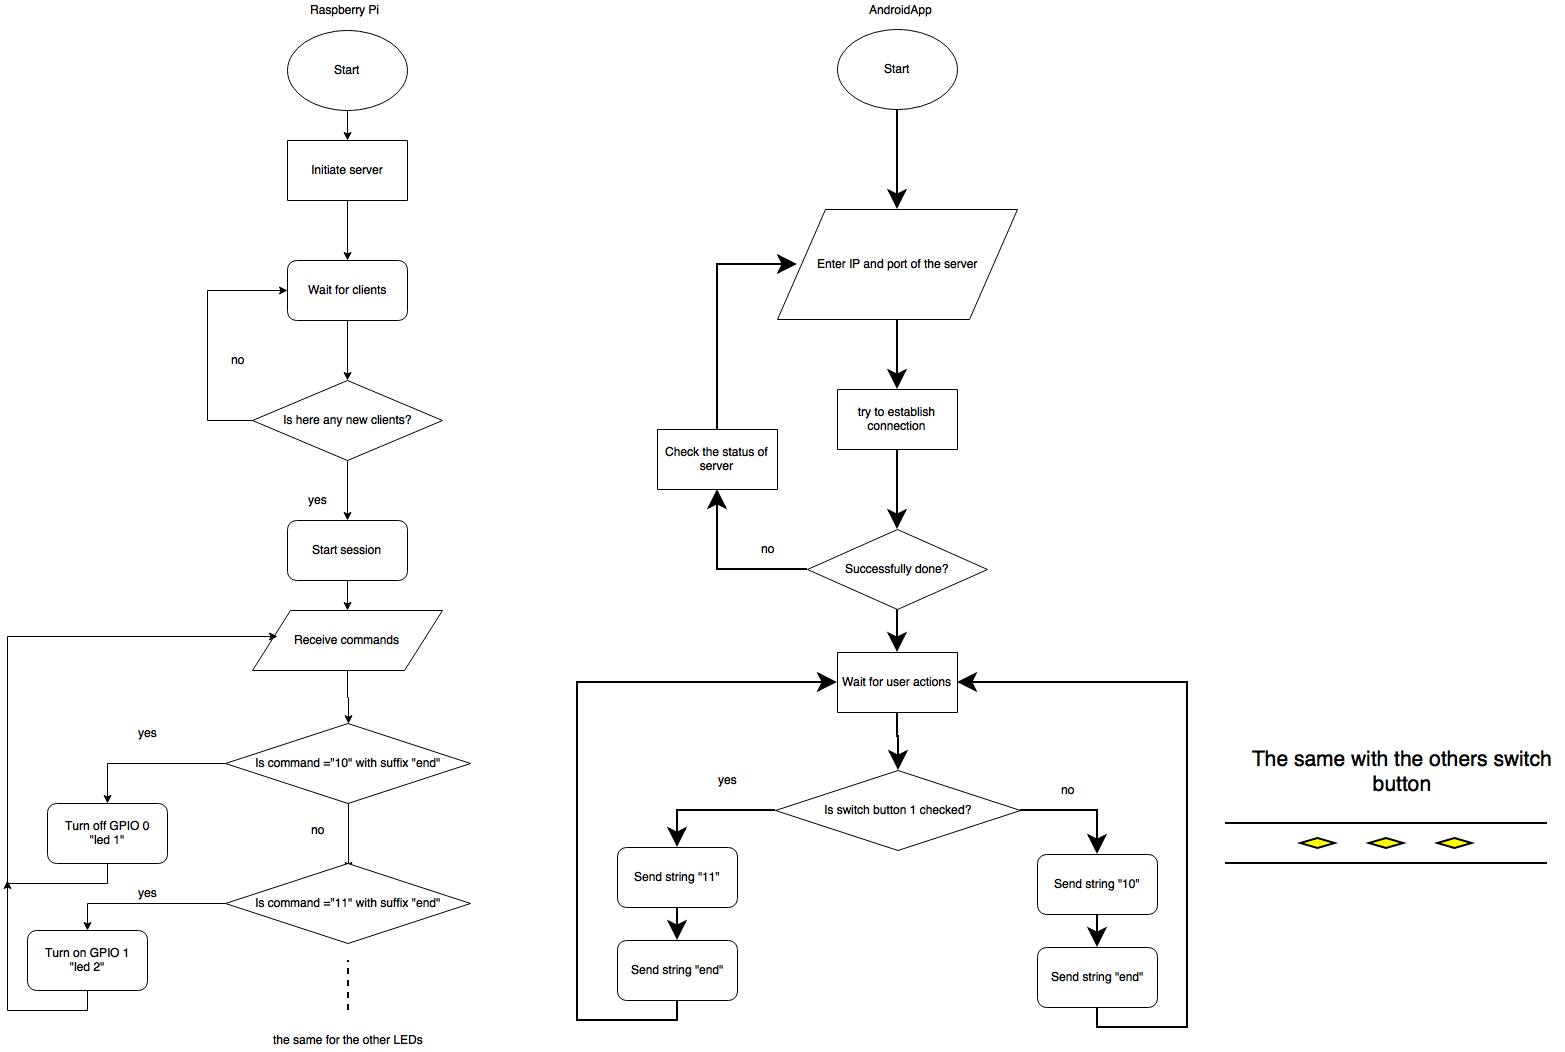
And here is a flowchart to explain what is done inside apps.
Pi4j library:
It is a friendly object-oriented I/O API and implementation libraries for Java Programmers to access the full I/O capabilities of the Raspberry Pi platform. It depends on the WiringPi native library and no need to install WiringPi because it is embedded in Pij4. Pay attention to Pin Numbering Schemes for your raspberry pi from here.Steps:
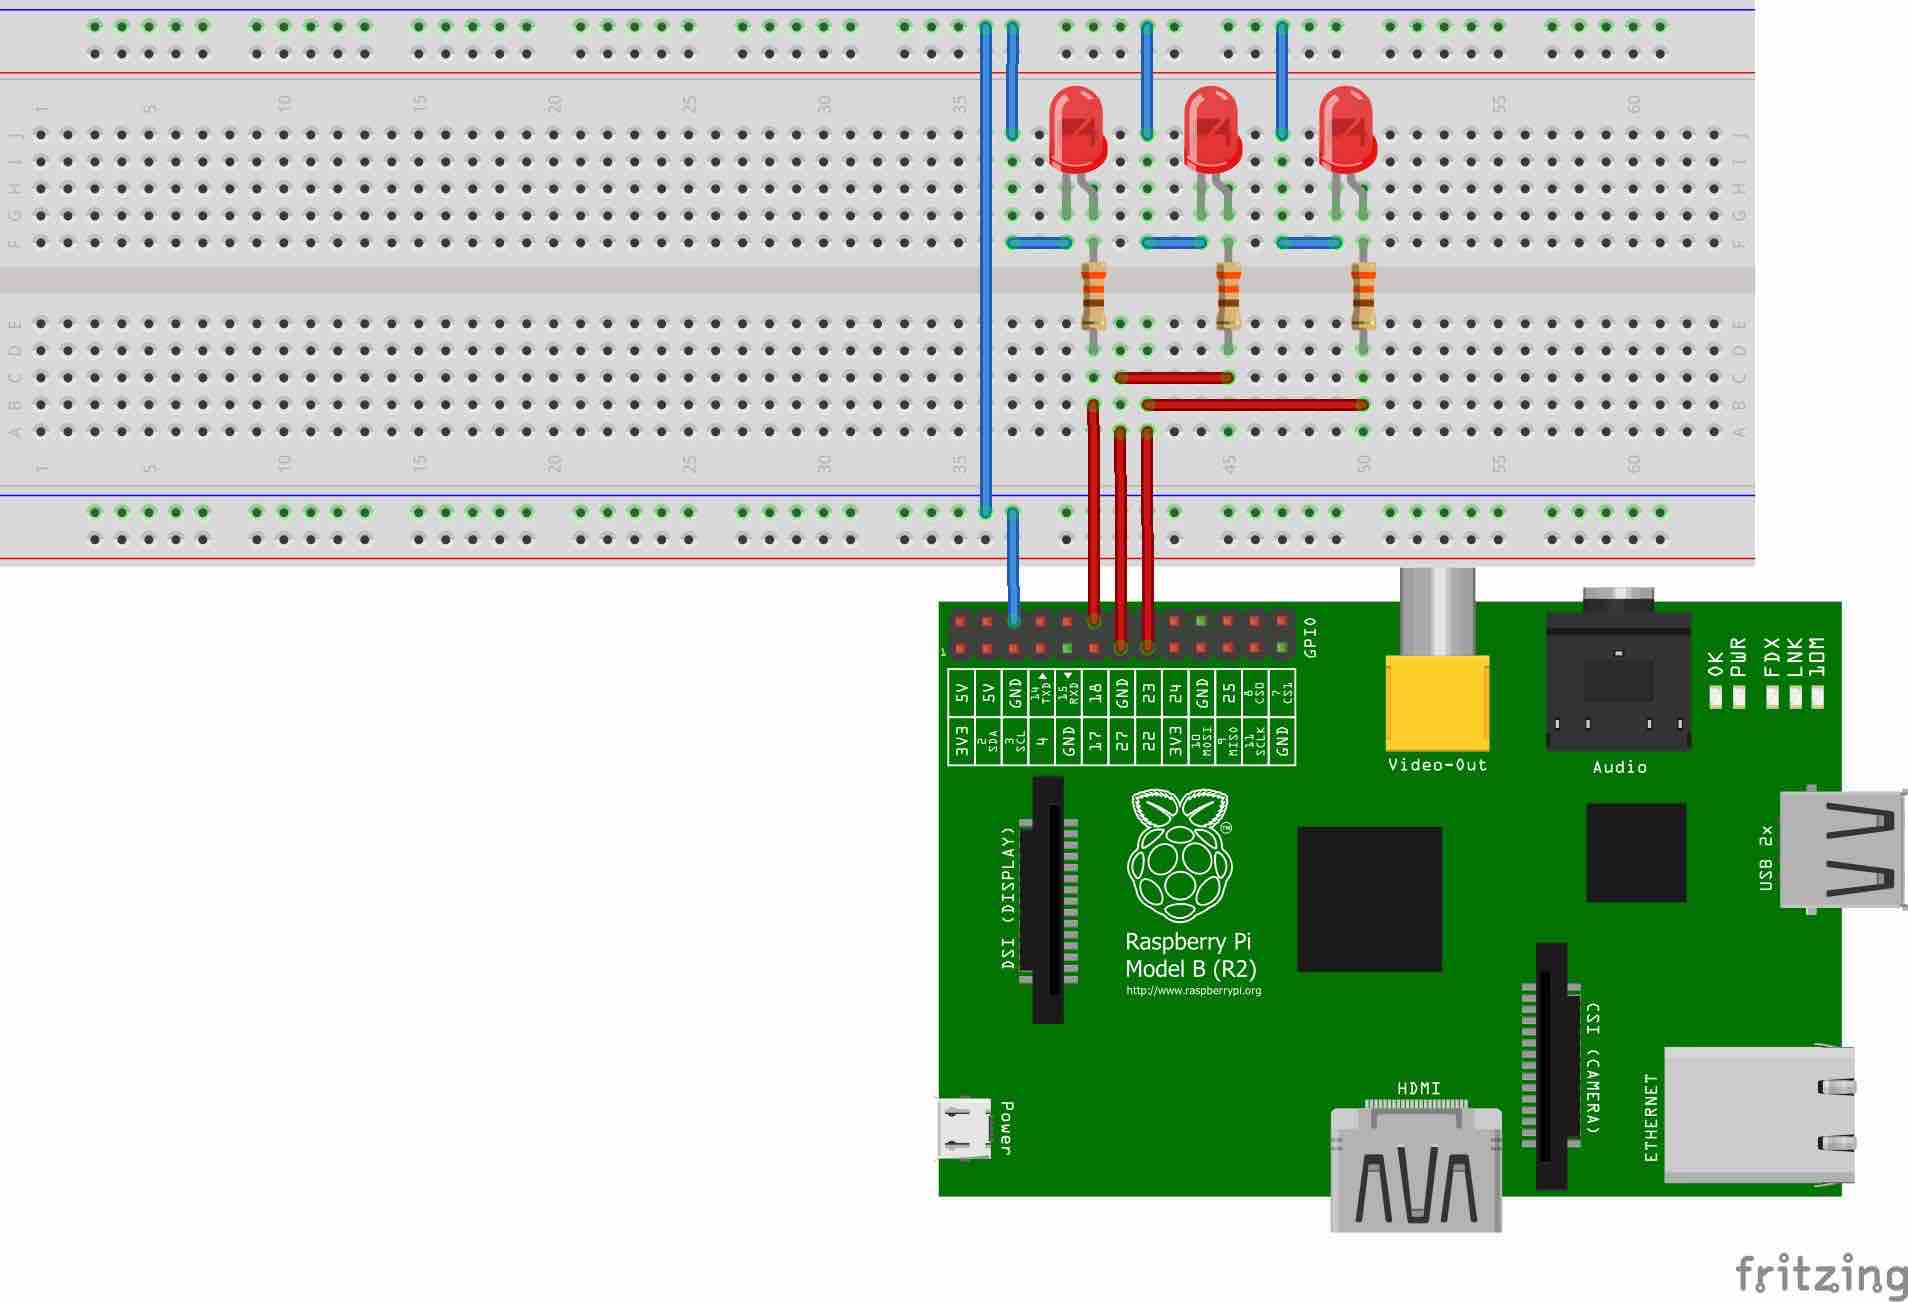
- Connect the circuit as shown LED 1 to GPIO 0, LED 2 to GPIO 1 and LED 3 to GPIO 2.
- GO to Github repository and download the zip file [or click here] which contains two projects one for Raspberry Pi “IOT_RaspberryPI” and the other “RaspberryPiClient” for android and bin folder.
- Open raspberry pi code with netbeans and android code with android studio and compile them.
- Run each app in its environment and enjoy controlling.
- Or simply skip the previous steps and directly try from the binaries which are in bin folder.
Test Video
Is there any other solutions to implement IOT with raspberry pi and android? Of course there is an other solutions to do your IOT project such as build web application and host it in raspberry pi so you can access it from anywhere like my old one here. There is An other solution is to use message broker server like MQTT in the future I will make a post about it.